Voice over tool update
Here’s how it works:
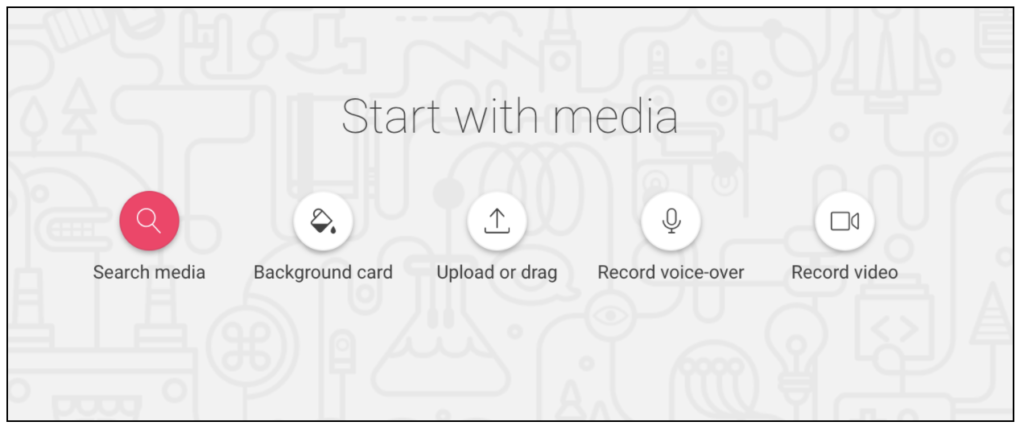
You no longer need to choose between starting a video with or without voice-over. Now, you can add voice-over to any video at any point in time.
Ready to add your voice-over to your video?
Simply click ‘Record voice-over’ to either record your voice in-app or upload any pre-recorded WAV or MP3 file.
Note: You will have the option to trim and split your recordings on the timeline later. It is not necessary to upload the recordings in a final order at this stage.
Note: Any audio files that you upload/record to the platform will be saved within that video project and won’t be shared with the team.
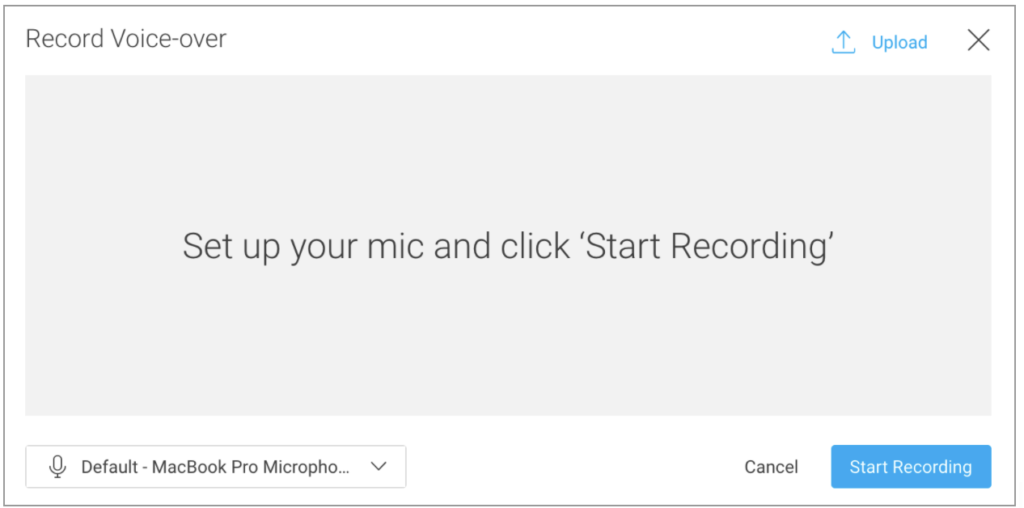
Record
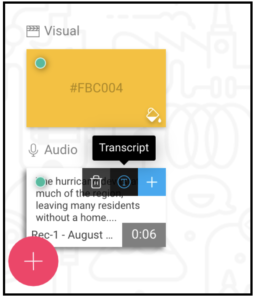
If you choose to record your own track, select a microphone from your computer options and click ‘Start recording’. Once you’re done, you can name the audio file and click ‘Save.’
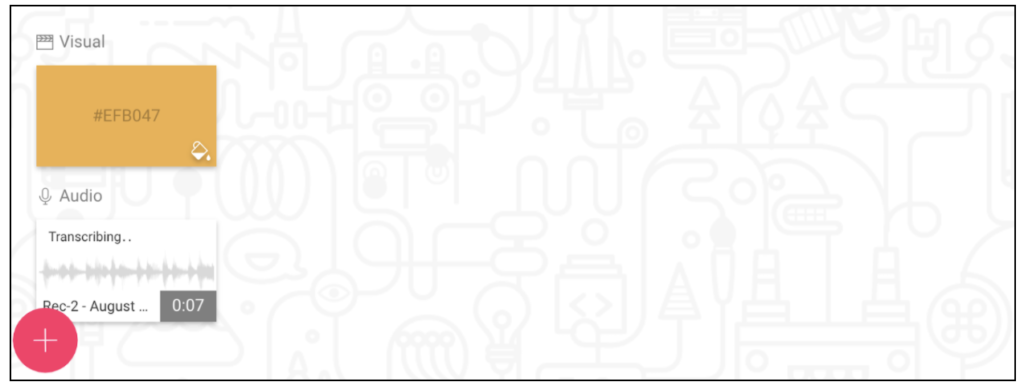
Your audio track will now appear in the Lightbox under ‘Audio,’ underneath a section for ‘Visual.’
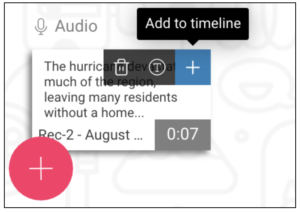
 Add to Timeline
You can drag the audio clip to anywhere on the timeline, or simply use the “+” button on the thumbnail of the audio clip to add it to the end of the timeline.
Move audio to Timeline
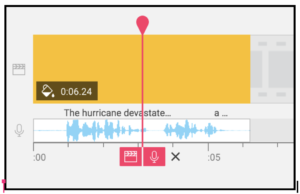
You can edit the voice-over clip freely on the timeline.
Use the cut tool to splice, you can trim the end and beginning of a clip, and you can drag and drop to place portions of the track anywhere along the timeline. The audio waveform serves as a clear guideline for cutting the voice over track.
Note: If you choose the cut tool where there is both a visual and an audio track, the tool will prompt you to choose which track you would like to cut.
You can use the multi-select button on the menu to move or delete audio clips together.
Note: The multi-select functionality is currently supported only for audio clips
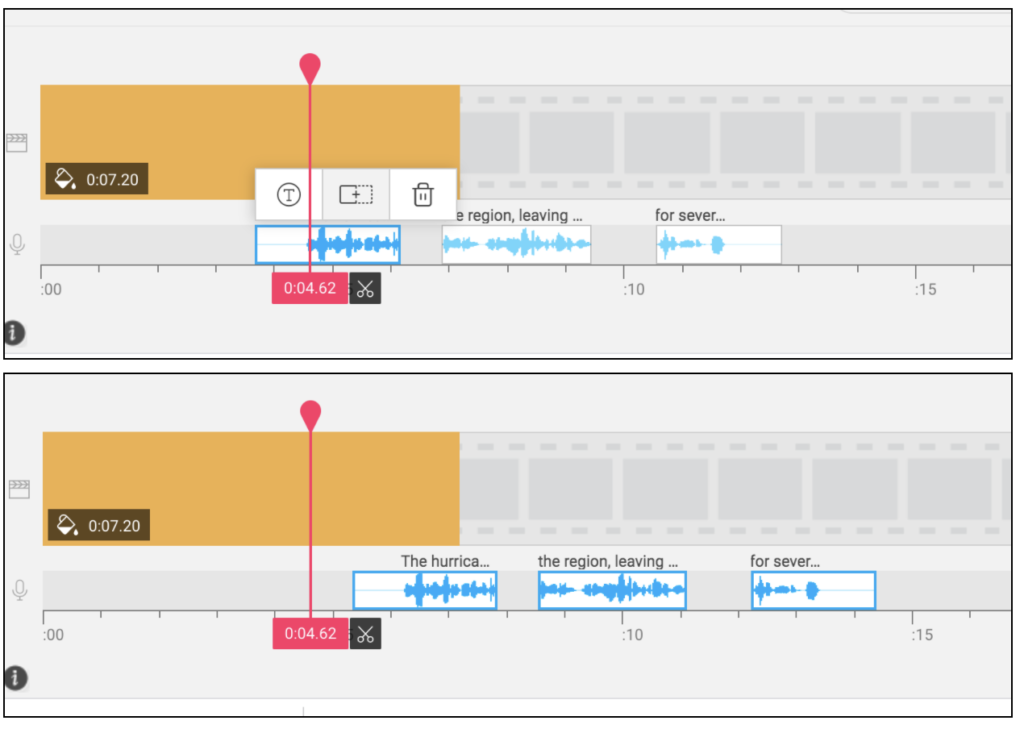 Transcription
Our technology automatically transcribes your audio file. Our auto-transcription services are available in most languages. To see a full list of languages supported, see the end of this article.
You can edit the suggested transcription. When done transcribing, you can hover over the track in the Lightbox and select the ‘Transcript’ icon to edit the text. There are time markers to indicate at what point in the recording a word is said.
Note: In the event that there is no auto-transcription available, you can insert your own script in the Transcript editor.
Edit transcript & use as closed-captions
You can add the transcript on the timeline as well by clicking on the ‘Transcript’ button on the timeline toolbar. Then, click on the ‘T’ icon on the audio clip to edit the transcript.

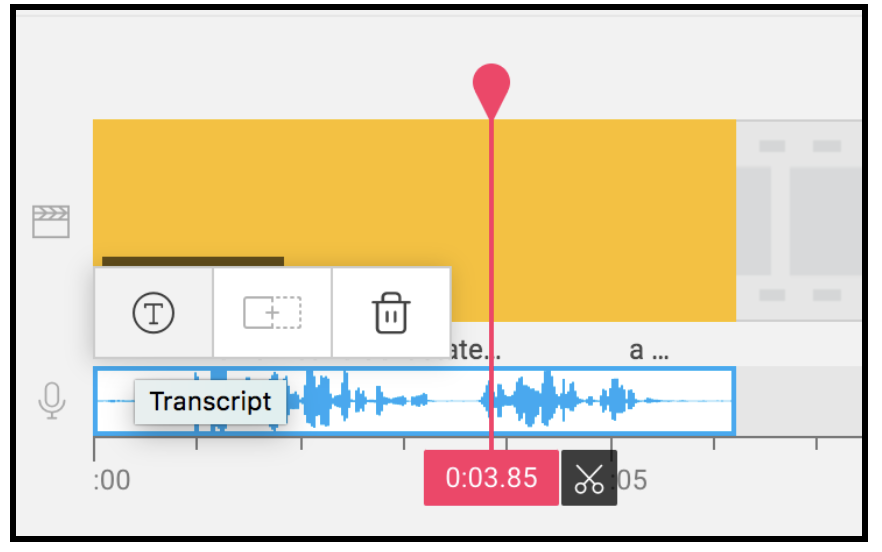
Here you will see the entire script including time markers. You can edit the transcript by highlighting a word or words and clicking the pencil icon.
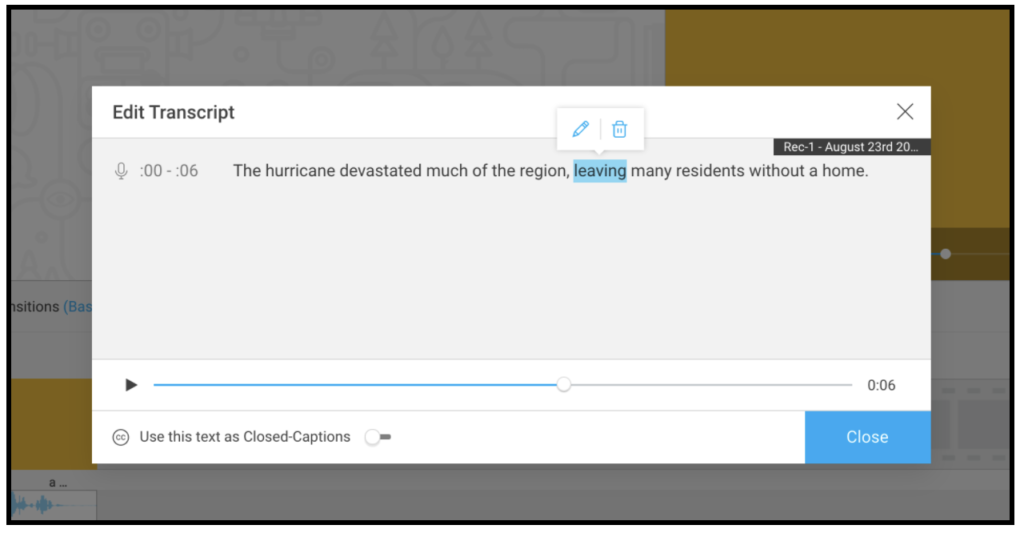
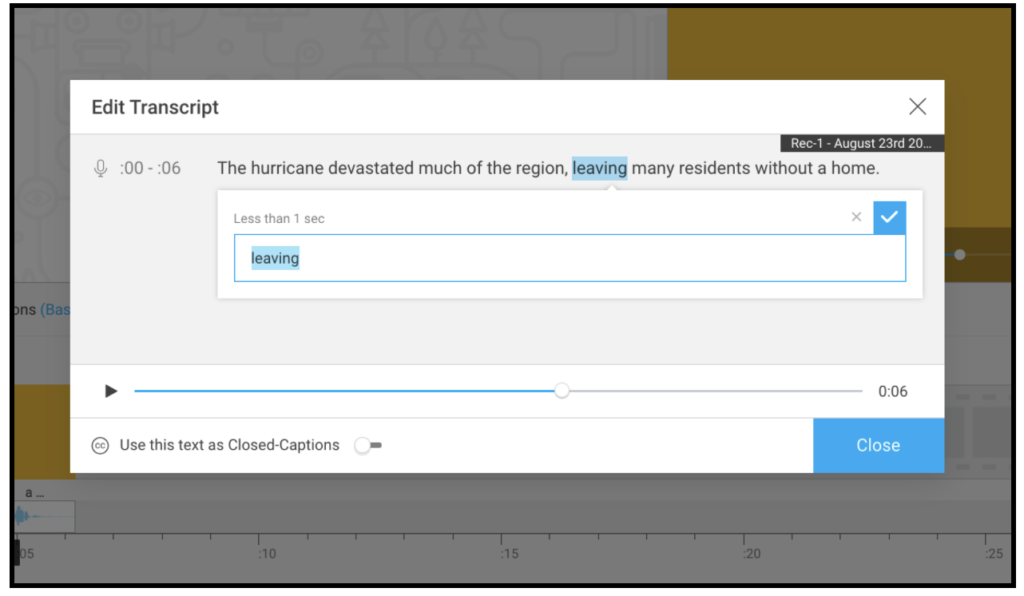 Note: It is recommended to edit small sections at a time in order to keep accuracy of the text timing.
You also have the option to use your transcription as closed captioning on your video.

If you choose this option, the transcription will automatically apply to any visual asset on the timeline laid above the voice over track. Notice that you can only see the closed captions upon clicking ‘Preview & Produce.’
The default caption text style is ‘Clean.’ If you wish to change to ‘Strip,’ or to use a custom style, contact your video strategist.
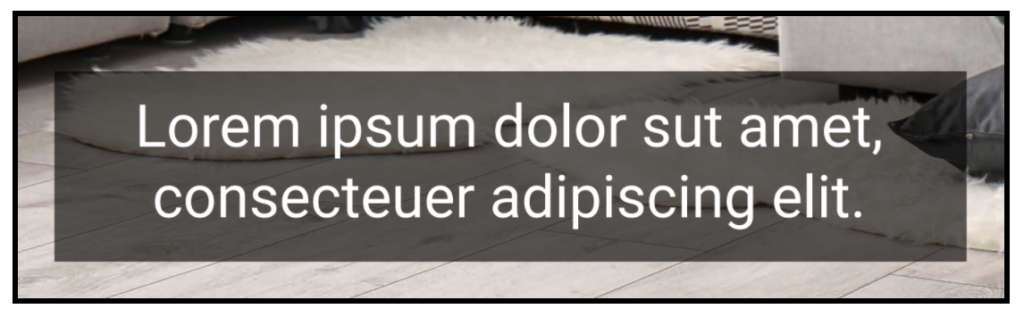
‘Clean’ closed-captioning text style

‘Strip’ closed-captioning text style
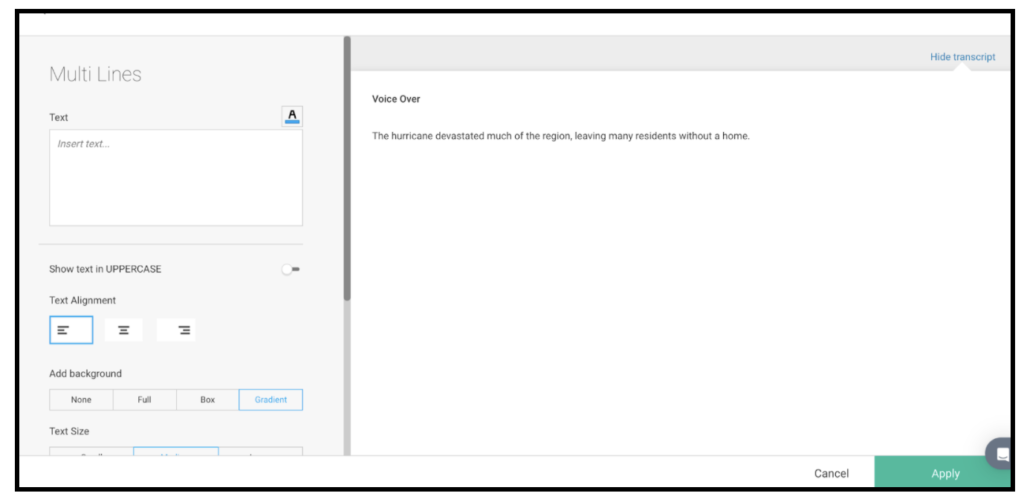
Add transcript as text-on-screen overlay
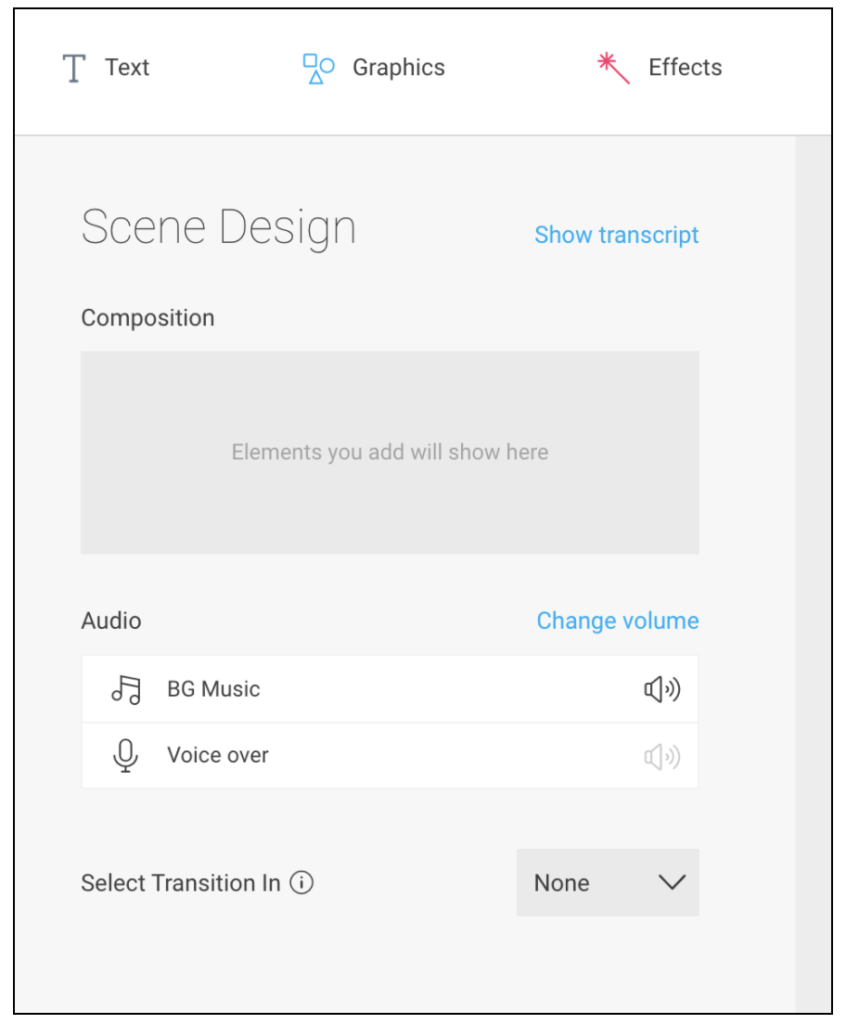
When you click on a scene with a voice-over track, you will see the transcript under ‘Scene Design.’ You can choose any text overlay, for example Multilines, and apply the transcript text that is playing during the scene you are editing.
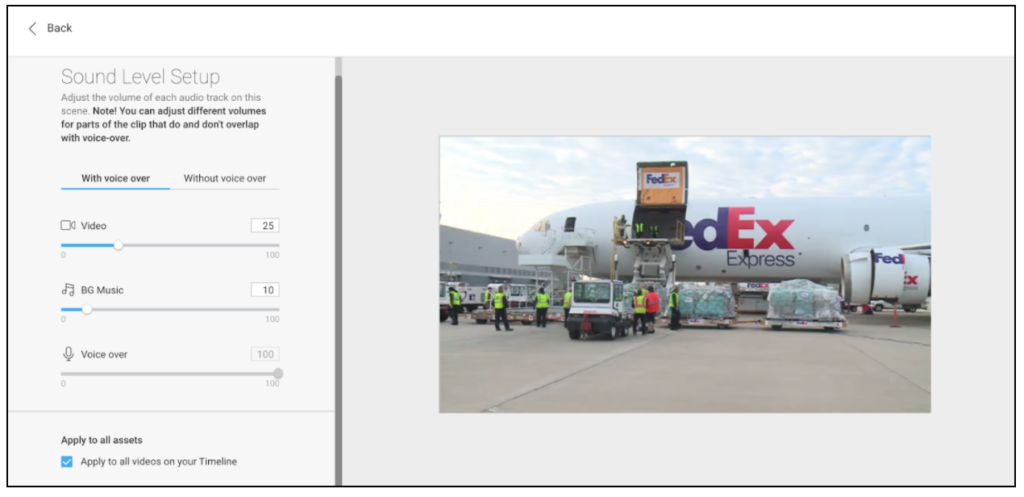
 Edit the sound levels
When editing an asset with a voice-over, in the Scene Design, you can control the levels for the portions of the clip with voice-over and without voice-over. You can choose to apply this to all clips along the timeline.
Preview & Produce
The length of the video cannot be longer than the length of the visual elements in it. If there is any empty space on the visual timeline where there is a portion of a voice over track, a red icon will indicate that you need to extend your visual timeline to fulfill the length.
Upon clicking ‘Preview & Produce,’ any closed captioning you have created will be added to the video.
Supported Languages:
- Gulf Arabic
- Modern Standard Arabic
- Mandarin Chinese – Mainland
- Dutch
- Australian English
- British English
- Indian English
- Irish English
- Scottish English
- US English
- Welsh English
- Spanish
- US Spanish
- French
- Canadian French
- Farsi Persian
- German
- Swiss German
- Hebrew
- Indian Hindi
- Indonesian
- Italian
- Japanese
- Korean
- Malay
- Portuguese
- Brazilian Portuguese
- Russian
- Tamil
- Telugu
- Turkish
Let’s get started
EXCELLENT! THANKS.
Watch your inbox (and spam folder, just in case).
We look forward to connecting with you soon.
Schedule a demo
EXCELLENT! THANKS.
Watch your inbox (and spam folder, just in case).
We look forward to connecting with you soon.